 After a fortuitous eBay acquisition of a SuperMicro H8DCL, I felt it was time to revisit my compact duallie build.
 Case: CoolerMaster Elite 360
Motherboard; SuperMicro H8DCL-I
Processors: 2x AMD Opteron 4122 (Dirt cheap and good for testing, BIOS updating. Will replace later)
Coolers: AMD Stock quad-heatpipe - unfortunately the less good updated ones!
RAM: 4x Samsung 8GB PC10666 DDR ECC Reg Low Power
PSU: Corsair CX430M
Fans: 2x CoolerMaster 120mm (Top outlet and side inlet),
Fans: 2x 80mm Akasa Paxfan 80x80x25mm 3-Pin Fans (two rear outlet)
GPU: PowerColor Radeon 6570 1GB with Arctic Accelero L2 Plus cooler
SATA backplane: StarTech SATABAY425BK 4x2.5
Fan bus: Phanteks PWM Fan Hub from Overclockers.co.uk
SATA Cables: Scavenged from Supermicro 0316L cables sets from Boston
 |
| PSU Bracket is held on by one screw |
Sadly, the Elite 360 case, and it's marginally larger brother, the 361 seem to increasingly scarce. However, the Powercool 3060 looks suspiciously similar with possibly a slightly better layout. First things first - we need to remove the plastic PSU mounting bracket which does nothing other than push the PSU further into the case so there's room for the rotating CoolerMaster logo - and ditch the logo too. The CoolerMaster 120mm fans are the stock ones that come with the 360 case which aren't too annoying at slow speeds.
Compared to last time, the H8DCL poses a few problems. Although at 12"x10" it is technically a little shorter than the K8N-DL, it mounts the two CPU's front to back rather than side by side which means the coolers impinge on the optical drive bay. Additionally, it requires 2x8 pin EPS power connectors which is generally only found on larger PSU's that certainly won't fit nicely into an Elite 360 case. It also only supports PWM fans and I have a caseload of 3-pin ones.
A quick calculation shows that the system above isn't going to draw more than about 350W at peak As a home server the 6570 is frankly overkill but I had it lying around and it's idle power draw (under 10W) isn't that much different from the passively cooled 4350 I used with the K8N-DL build. As such, the Corsair CX430M has more than ample power capacity with the added advantages, for a tight build, of being modular and 140mm deep. This is 15-20mm shorter than most other modular power supplies which makes a big difference. The modular connector panel has an 8-pin socket labelled 4+4CPU/PCI-E but, of course, only comes with a PCI-E cable (there is a non-modular 8-pin EPS cable already).
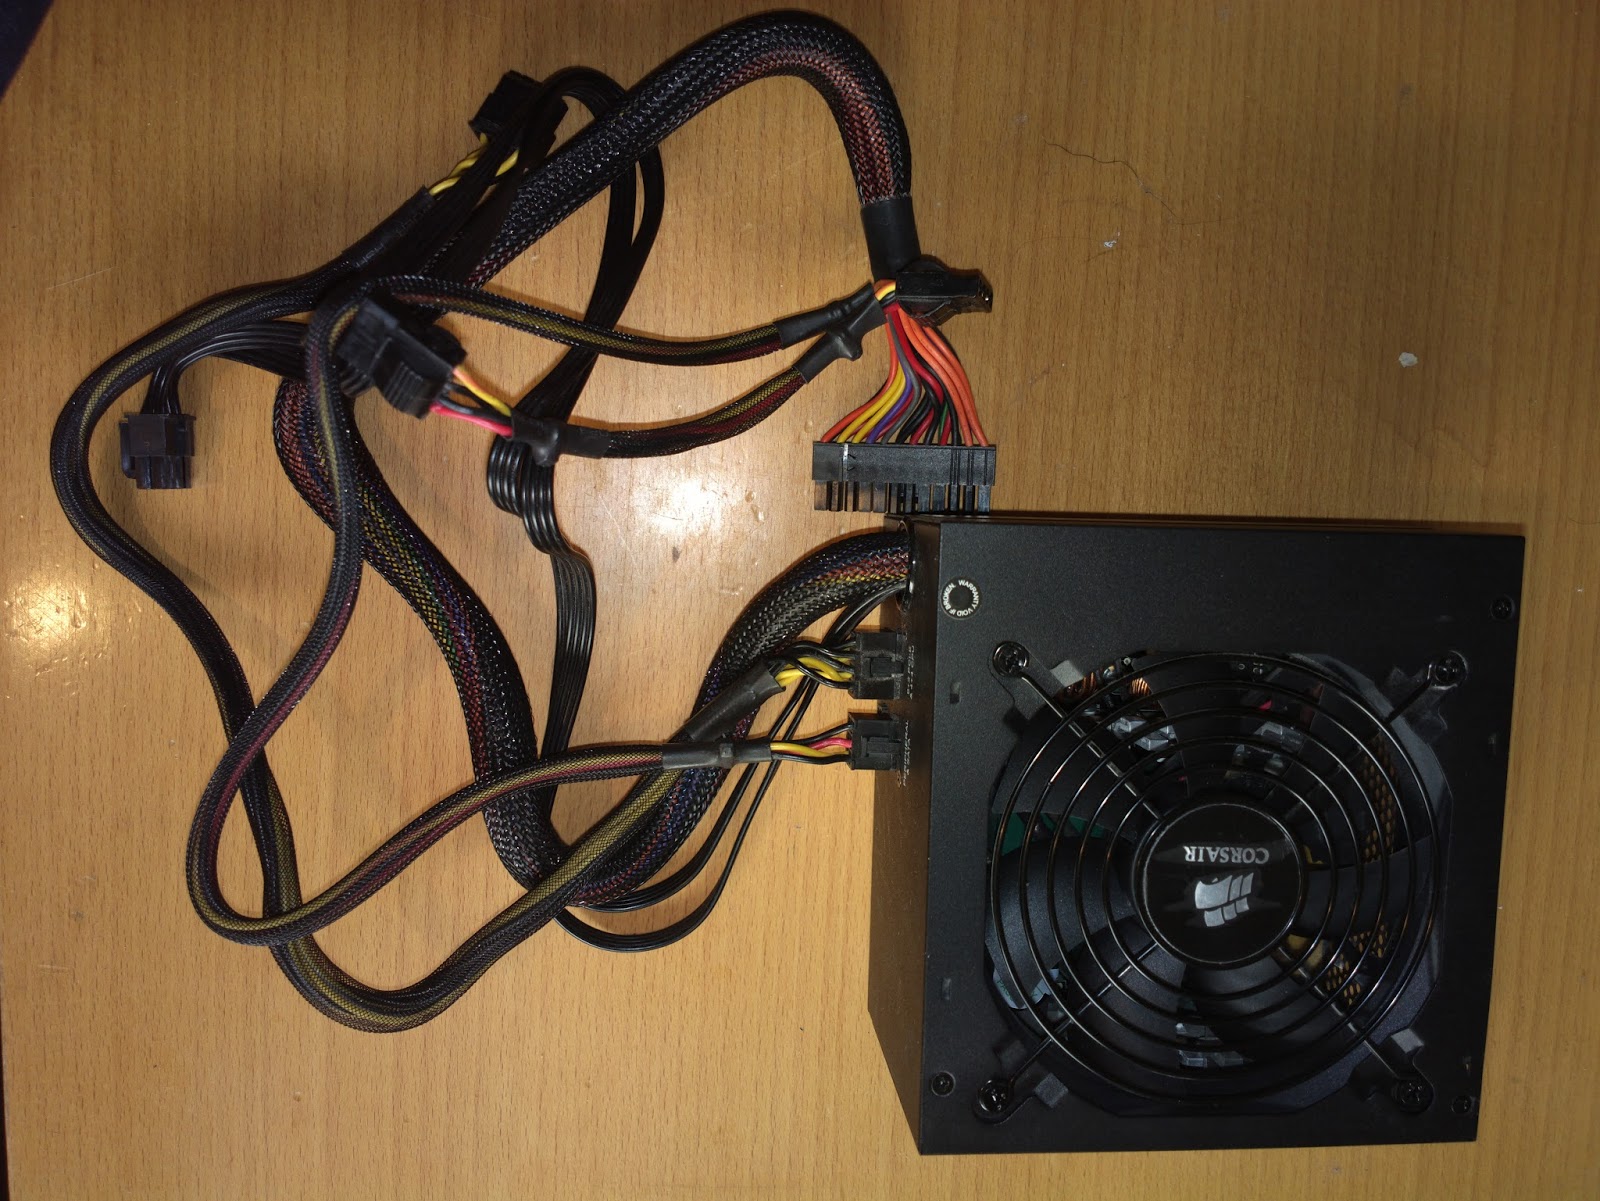 |
| Franken-PSU |
 |
| The 4-pin cable is routed under the 120mm fan |
On with the build. Sequencing is everything since this is a tight fit. First, I get the rear and top fans into case and wind the cables round a screwdriver shaft to make them coil up - this stops them dangling around in the way. The Phanteks PWM hub allows you to drive up to 6 3-pin fans at variable speed from a single PWM header. Although it does have an additional SATA power connection in case the fans draw too much current for the single 4-pin header I have a Supermicro board here so I'm not bothering. Supermicro specs these fan headers to drive the 7K+ rpm banshees in 1U server cases.

Now it's time to drop the motherboard into the case and it goes in quite easily except that it doesn't have the holes in quite the right places. I end up having to remove 3 standoffs (leaving 7 in place) and using a couple of plastic board supports I had leftover from the days of baby Baby-AT boards into holes which didn't match the ATX spec. There a fan header top right which is very convenient for the PWM hub connection. Just to check there are no shorts, I connect a PSU to the motherboard and fire it up. All seems well until I notice that only half the RAM is showing which could mean a problem with the second CPU or maybe damage to the underside of the board. After a small panic and a bit of poking around I realise that the two sticks of RAM in the top bank are in the black slots while the bottom bank has them in the blue - moving them to all blue results in everything working properly.
 |
| All the cabling hidden behind the front panel! |
Now I can install the SATA backplane. I've noticed that the pegs on the sides of the mounting rails stick a little far into the casing and can snag on the HDD trays so I trim a mm off the end of each one with knife. The molex power cable is just long enough for the second connector to reach the back of the backplane - there was a reason I cut it down to two even though I only need one!
 Nearly there. Supermicro slim SATA cable sets are really useful here. They are basically very similar to Silverstone's CP11 ultra slim SATA cables but a lot cheaper - and the two cables are neatly sleeved together. You can get a set of 4 for the same price or cheaper as one Silverstone cable. They don't have Silverstone's fancy side-entry connectors but the connectors are odd in that the right angle connectors are top-entry. The pic shows 4 SATA cables from the backplane running along the top edge of the PSU - it is very compact. I've also stuck the video card in now.
 Finally the side/top panel needs a bit of work. The 120mm fan at the top blows down onto the CPU's and I'm coiling the cable for that so it doesn't snag in the other fans when it gets plugged into the PWM hub. The bottom vents let air in for the video card and the PSU. I've stuck fine stainless steel mesh over both vents. Cut the mesh 2cm larger than the vent all round and then fold 1cm over and fix with double sided tape to get the sharp ends of the wire out of the way. Use a strip of car trim double sided fixing tape to fix it to the case (it's designed to be weather and vibration-proof so should stay put).